
An Extraordinary Wildlife 9-Day Photography Adventure (2027–2029)
A Detailed Tanzania Wildlife Photography Safari
Duration: 9 days / 8 nights
Destination: Northern Tanzania
Main destinations: Tarangire National Park, Serengeti National Park, Ngorongoro Conservation Area and Ngorongoro Crater
Safari style: Private wildlife photography safari
Pace: Moderate, with early starts and extended time in wildlife areas
Transport: Private 4×4 safari vehicle with a pop-up roof, with a photography-friendly seating arrangement where available
Best suited for: Wildlife photographers, nature lovers, birdwatchers, photography groups and travellers interested in observing animals in their natural environment
Travel period: 2027–2029
Introduction: An Extraordinary Wildlife 9-Day Photography in Tanzania
Tanzania is one of Africa’s most rewarding destinations for wildlife photography. Its national parks contain a wide range of landscapes, from the open grasslands of the Serengeti to the baobab-dotted plains of Tarangire and the dramatic volcanic scenery of Ngorongoro Crater. These different environments support a rich variety of wildlife and give photographers opportunities to create images that go beyond ordinary animal portraits.
This nine-day photography safari is designed for travellers who want to spend meaningful time in the field. The itinerary combines game drives, wildlife observation, landscape photography and time to review photographs between activities. It also allows some flexibility for changing weather, animal movements and unexpected sightings.
The journey begins in Arusha, the main gateway for safaris in northern Tanzania. From there, you travel to Tarangire National Park, a destination known for its elephant herds, ancient baobab trees and varied birdlife. The safari then continues to the Serengeti, where several days are reserved for photographing predators, grazing animals, birds and the open plains.
The final part of the journey takes you towards the Ngorongoro highlands, followed by a game drive inside Ngorongoro Crater. The crater provides a different setting from the Serengeti. Its grasslands, wetlands and wooded areas support a wide variety of animals within a dramatic landscape formed by volcanic activity.
The Great Migration may be part of the experience, depending on the month of travel and the location of the herds. However, it is important to plan realistically. Wildebeest movements, river crossings and predator activity are natural events and cannot be scheduled to suit a visitor’s arrival.
The aim of this itinerary is to provide a good balance between travel and photography. Instead of moving to a new destination every day, the programme allows several nights in the Serengeti so that you have time to return to productive areas and work on different photographic subjects.
A successful photography safari does not depend only on the number of animals seen. It also depends on light, patience, positioning and the ability to recognise interesting behaviour. A lion resting under an acacia tree, elephants walking through dust, a bird perched in the morning light or a herd crossing an open plain can all make strong photographs when the conditions are right.
This journey is suitable for beginners who want to improve their wildlife photography as well as experienced photographers looking for a varied collection of African wildlife images. The daily activities can be adjusted to suit your interests, provided the changes are compatible with park regulations, road conditions and the accommodation arrangements.
Day 1: Arrival in Tanzania – Transfer to Arusha
Overnight: Arusha
Main activities: Airport pickup, hotel transfer, rest and safari briefing
Photography focus: Lodge surroundings, landscape details and equipment preparation
Your photography adventure begins when you arrive at Kilimanjaro International Airport. After completing arrival formalities and collecting your luggage, you will meet your safari representative for the transfer to Arusha.
The journey to Arusha generally takes around 45–90 minutes, depending on traffic and the location of your accommodation. The town is a convenient starting point for northern Tanzania safaris, with access to Tarangire, Serengeti and the Ngorongoro Conservation Area.
After checking in, take time to rest following your international flight. The next several days will involve early departures, long periods in the safari vehicle and changing weather conditions. A comfortable first evening helps you prepare for the journey ahead.
If you arrive early enough, you may have an opportunity to photograph the lodge gardens, nearby trees, birds or the surrounding landscape. On a clear day, Mount Meru may be visible from suitable locations around Arusha. These photographs provide a useful beginning to your travel collection and give you time to check your camera settings before entering the national parks.
Preparing your camera equipment
Use the afternoon to organise your equipment. Check that your batteries are charged, memory cards are ready and lenses are clean. If you use two camera bodies, confirm that both are working correctly and that their settings are suitable for wildlife photography.
A practical equipment list includes:
- A camera with reliable autofocus and good performance in changing light.
- A telephoto lens, such as a 100–400 mm or 150–600 mm lens, for distant animals.
- A standard zoom lens for general scenes and environmental portraits.
- A wide-angle lens for landscapes, large herds and broad views.
- Spare batteries and sufficient memory cards.
- A lens cloth, dust blower and rain cover.
- A camera bag that can be stored securely in the safari vehicle.
- Binoculars for locating animals before taking photographs.
- An external storage drive or another reliable backup option.
You do not need to carry every piece of equipment you own. Choose the lenses you can handle comfortably and that suit the type of photographs you want to make.
A telephoto lens is useful for photographing distant wildlife, but a wide lens is equally important when the surroundings tell part of the story. A photograph of an elephant beside a baobab tree, for example, may be more informative than a tight image of its face.
Safari briefing
Later in the afternoon, meet your guide to discuss the route, driving arrangements and photography priorities. Explain whether you are mainly interested in predators, elephants, birds, animal behaviour, landscapes or a mixture of subjects.
If you are travelling with other photographers, discuss how much space everyone will need for cameras and lenses. A private vehicle provides more flexibility than a shared safari, but seating arrangements should be confirmed in advance.
Your guide can also explain how daily plans may change according to wildlife movements and road conditions. Although the itinerary provides a clear route, the most useful game drive is not always the one that follows the original plan exactly.
After dinner, prepare your camera bag for the following morning and get enough rest before the first park visit.
Day 2: Tarangire National Park – Elephants, Baobabs and Birdlife
Overnight: Tarangire area
Main activities: Morning and afternoon game drives, wildlife observation
Photography focus: Elephants, baobab trees, birds, landscapes and animal behaviour
After an early breakfast, leave Arusha and travel to Tarangire National Park. The road journey usually takes around two to three hours, depending on your departure point, traffic and road conditions. Once the entry arrangements have been completed, your wildlife photography activities begin.
Tarangire is known for its elephant population, impressive baobab trees and varied habitats. Seasonal swamps, open grassland and woodland provide different settings for photography, making the park an excellent introduction to Tanzania’s wildlife.
The Tarangire River is an important source of water, particularly during dry periods. Wildlife distribution changes throughout the year, so the number of animals visible in a particular area depends on the season and recent rainfall.
Morning: Photographing elephants
Elephants are likely to be among the main subjects of the day. You may encounter individuals feeding, family groups walking through the woodland or herds moving towards water.
When photographing elephants, look for more than a clear view of the animal. Their interactions can produce interesting images, especially when calves stay close to adults or when a group moves together through the landscape.
A photograph of an elephant walking past a baobab can show the scale of the tree and the animal at the same time. A wider frame may include the surrounding grassland, while a tighter composition can concentrate on the elephant’s face, trunk or skin texture.
Pay attention to the background. Branches crossing the elephant’s head or bright patches of sky behind its body can make an otherwise strong photograph less effective. When the vehicle can be repositioned safely and legally, your guide may help you find a clearer angle.
For walking elephants, a shutter speed around 1/1000 second can be a useful starting point. Faster settings may be necessary when calves are playing or animals are moving quickly. Adjust the settings according to the light and the movement of the subject.
Bird photography in Tarangire
Tarangire is also a rewarding destination for bird photography. Depending on the season and habitat, you may encounter hornbills, rollers, kingfishers, raptors and a variety of smaller birds.
Birds often require a different approach from large mammals. A long lens helps isolate distant subjects, while a fast shutter speed can reduce blur when a bird takes flight. Continuous autofocus is useful when the subject is moving.
Try to photograph birds in different situations. A bird perched on a branch may make a clean portrait, while one feeding on the ground can provide a more natural behavioural image. If the surroundings are attractive, include some of the habitat rather than filling the entire frame with the bird.
Your guide can help identify likely birding locations and recognise species that are difficult to spot. The exact birds seen will depend on the time of year and local conditions.
Midday break
Around midday, stop at a designated picnic area or return to your accommodation if the location and schedule make this practical. Use the break to eat, drink water, rest and check your camera equipment.
The midday sun can produce strong shadows and harsh highlights. Rather than forcing every sighting into a photograph, use the time to review selected images and consider which subjects you want to photograph during the afternoon.
Afternoon: Landscapes and wildlife behaviour
Continue exploring Tarangire after the break. The afternoon light may bring warmer tones to the grassland and emphasise the shapes of the baobab trees.
Look for giraffes browsing among trees, zebras moving across open ground and antelopes feeding in the grass. These subjects can help create a varied collection rather than one dominated by elephants.
A photograph does not always need to show the animal from close range. Sometimes a small group of giraffes beneath a large sky communicates the scale of the landscape more effectively than a close-up portrait.
Return to your lodge in the late afternoon or early evening, following the permitted schedule. After dinner, back up your photographs and prepare for the journey to the Serengeti the next day.
Day 3: Journey to Serengeti National Park – The Start of the Plains Experience
Overnight: Serengeti National Park
Main activities: Road transfer, landscape viewing and an optional short game drive
Photography focus: Open plains, acacia trees, giraffes, zebras and travel-day wildlife
After breakfast, leave the Tarangire area and travel towards Serengeti National Park. This is one of the longer travel days of the safari. The journey may take much of the day, depending on the route, the location of your camp, road conditions and the time required for park formalities.
The drive should be planned realistically. There may be opportunities to photograph wildlife along the route, but it is important to leave enough time to reach the Serengeti accommodation without rushing.
As the landscape changes, you may pass through rural settlements, cultivated areas and highland scenery before reaching the more open country associated with the Serengeti ecosystem. These transitions are worth recording because they help show the range of environments found in northern Tanzania.
Photographing the journey
Keep your camera accessible but protected from dust. Road transfers can be bumpy, and opening a camera bag repeatedly on dusty tracks increases the chance of dust entering the equipment.
When suitable stops are available, look for wide landscape compositions. A road disappearing towards distant hills, scattered trees on open grassland or a line of animals moving across a ridge can create useful photographs that establish the setting.
If wildlife appears beside the route, listen to your guide’s advice about whether stopping is permitted. Do not expect to leave the vehicle or walk into the landscape wherever you choose.
The aim is to make a few worthwhile images without turning the transfer into a series of lengthy stops that delay your arrival.
Entering the Serengeti
The Serengeti is famous for its open plains, rocky kopjes, woodland areas and large populations of grazing animals and predators. It is also an important part of the Great Migration ecosystem.
Because the park is extensive, the location of your accommodation has a direct effect on the wildlife you can photograph. Central Serengeti is a useful base for general wildlife viewing, while other sectors may offer better opportunities during particular stages of the migration.
The most suitable area for this itinerary should be chosen according to the month of travel. Southern plains can be important during the calving period, while northern areas may offer opportunities to observe migration-related river activity during parts of the year.
Neither the location of the herds nor a particular wildlife sighting can be guaranteed. A good guide will use recent information to select the most promising routes while keeping the schedule realistic.
If you arrive with sufficient daylight remaining, enjoy a short game drive near your accommodation. Otherwise, check in, unpack and prepare for the following morning.
Evening preparation
During the evening briefing, discuss the subjects you hope to photograph during your Serengeti stay. You may want to concentrate on lions, leopards, cheetahs, large herds or birdlife.
Check your batteries and memory cards before dinner. Keep a warm layer and rain protection available because conditions can change between early morning and afternoon.
The following days will focus on spending more time in the field rather than covering long distances between destinations.
Day 4: Central Serengeti – Lions, Leopards and Predator Photography
Overnight: Serengeti National Park
Main activities: Early-morning and afternoon game drives
Photography focus: Lions, leopards, cheetahs, predator behaviour and animal portraits
Begin the day early, according to the accommodation location and park regulations. Morning light is often favourable for photography, and predators may still be active after moving during the night.
Central Serengeti offers opportunities to photograph lions, leopards and cheetahs, although sightings depend on local conditions. Your guide will use knowledge of the area and recent wildlife reports to decide where to begin.
Lions and pride behaviour
Lions can provide several types of photographs. A single animal resting in golden grass may make a strong portrait, while a pride moving together can create a more dynamic scene.
Observe the group before taking photographs. Look for interactions between adults, cubs resting beside their mothers or animals changing position as the morning progresses.
When photographing a lion, check that the eyes are sharp and that grass or branches do not obscure important features. If the animal is lying down, a lower camera angle may help create a more natural portrait, depending on the vehicle and the permitted viewing position.
A wide photograph can be useful when the surrounding landscape adds context. A tighter image is more suitable when the animal’s face or expression is the main subject.
Photographing leopards
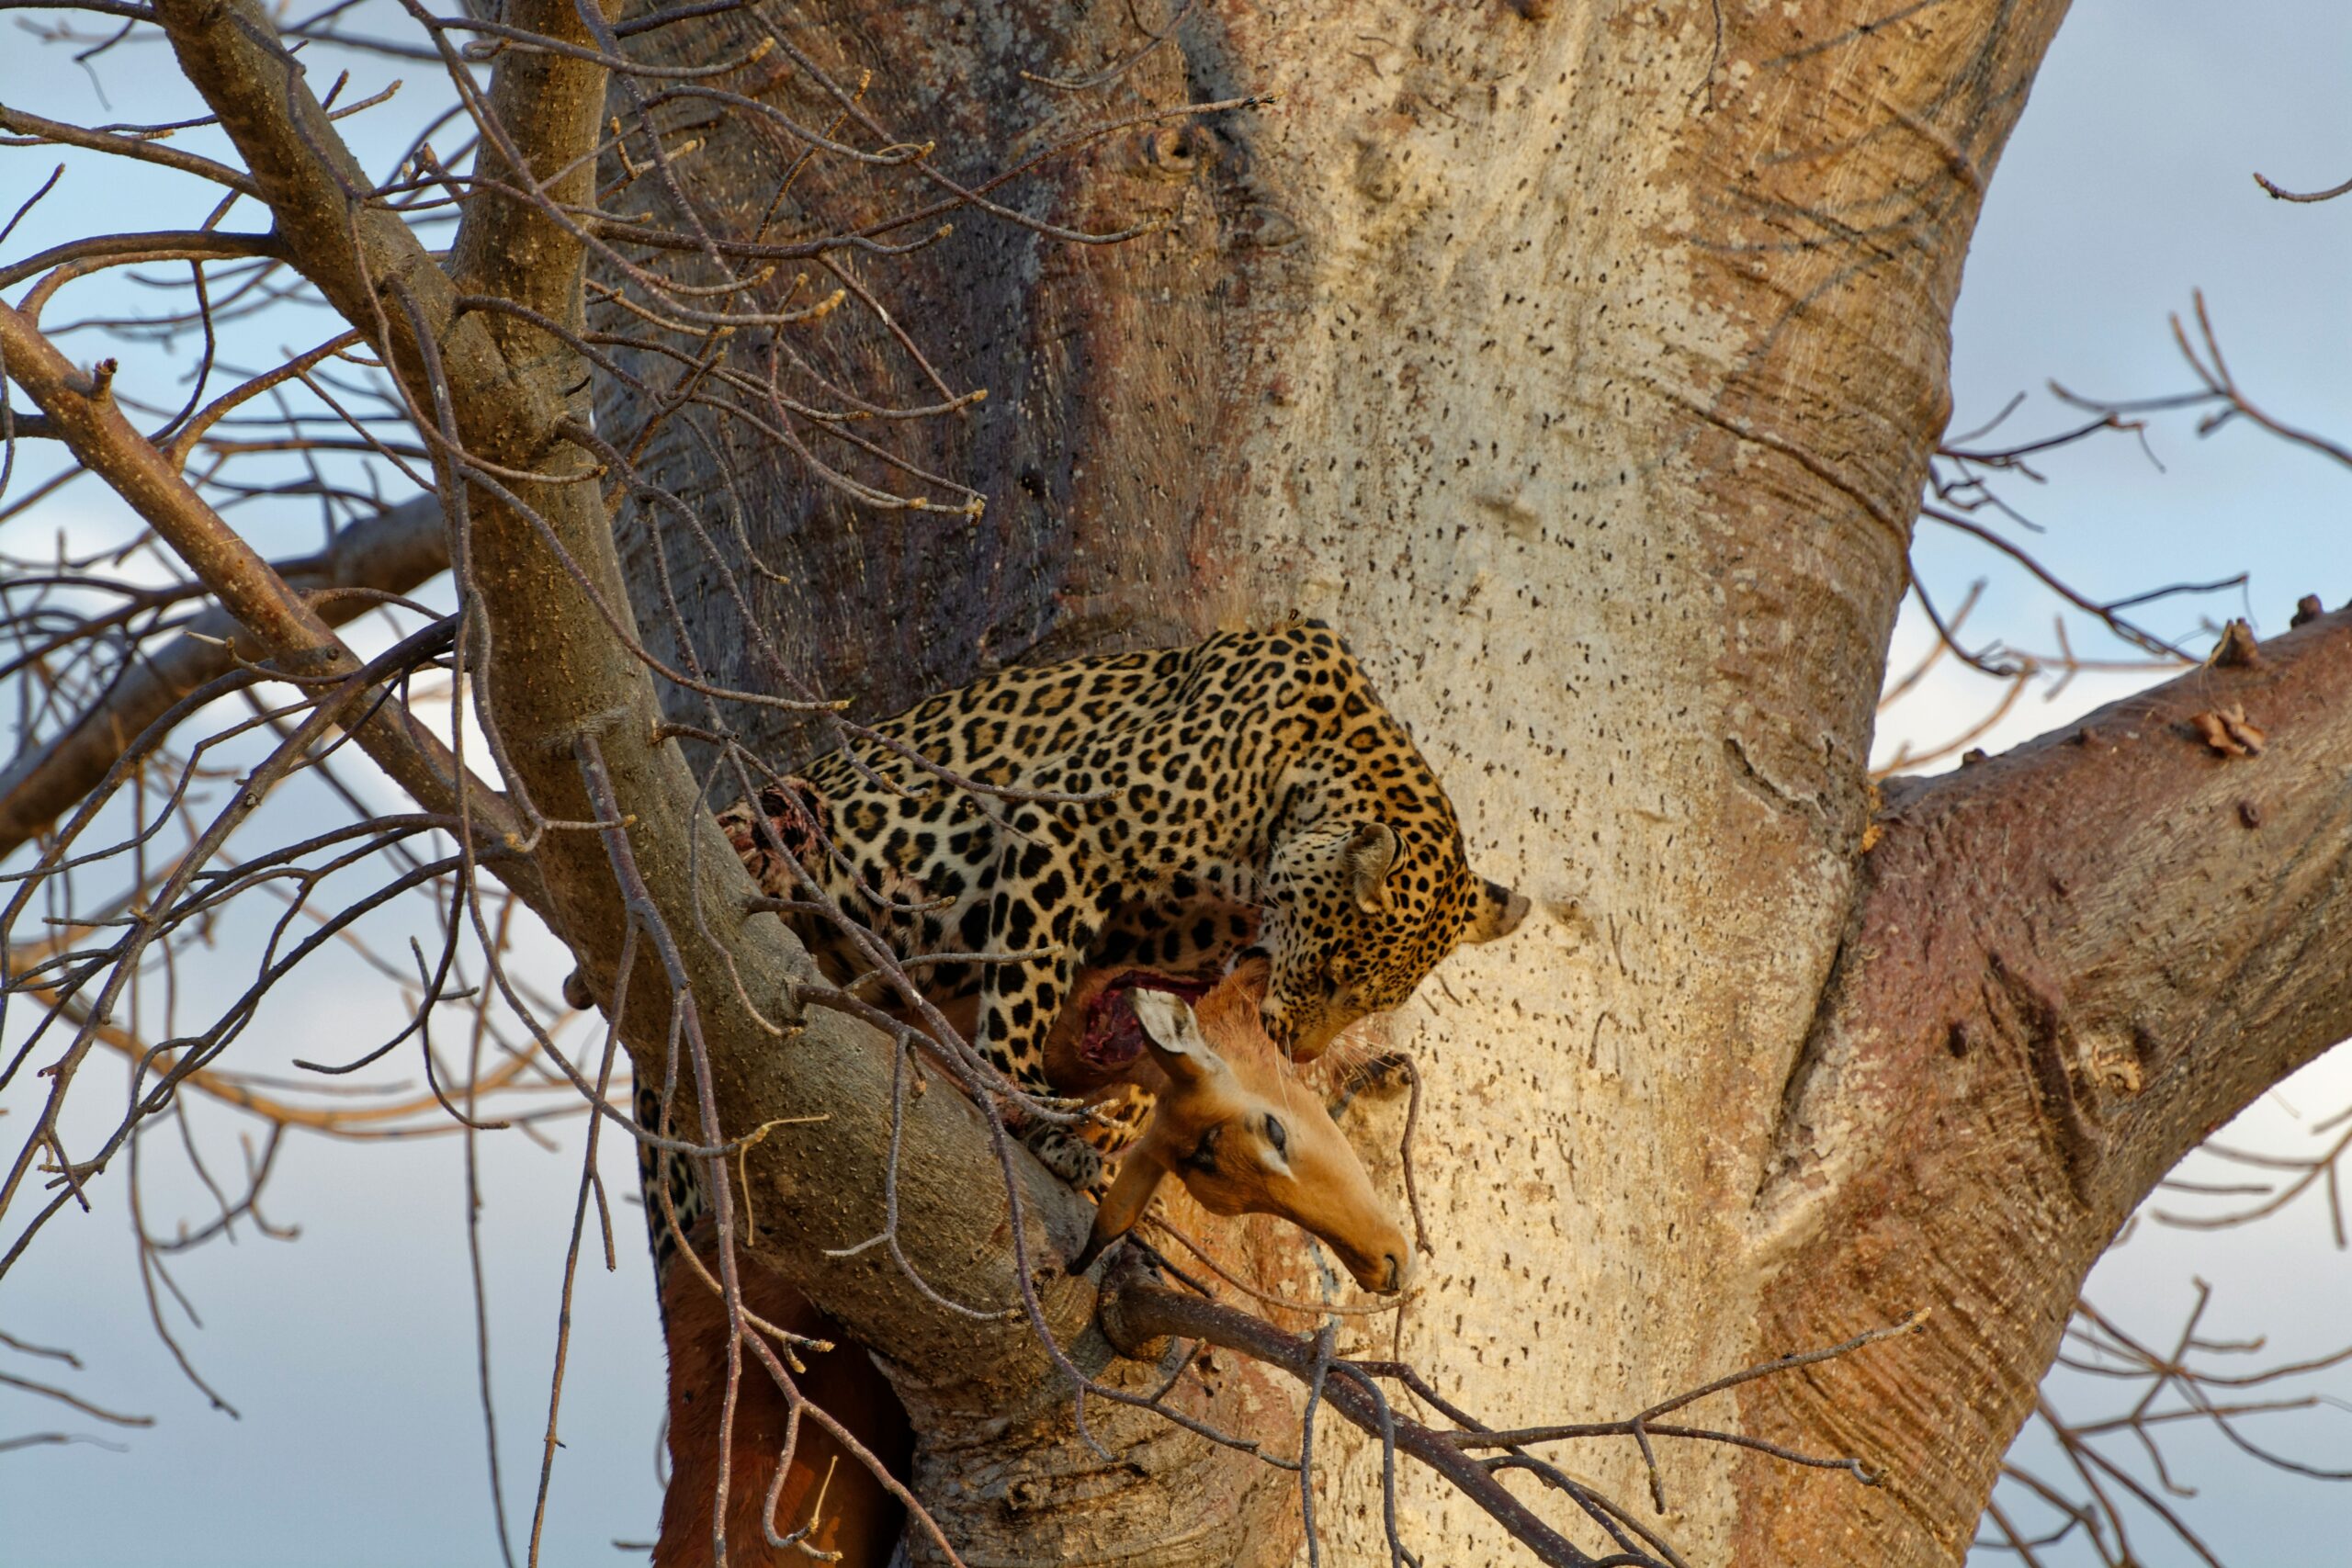
Leopards can be difficult to photograph because they often rest in trees or move through thick vegetation. Their spotted coats blend into branches and shadows, making autofocus and exposure more challenging.
If a leopard is resting in a tree, consider photographing the whole setting rather than concentrating only on its face. The shape of the branches and the animal’s position within the tree can create an interesting composition.
When the leopard moves, follow the head and keep enough space in the frame for the direction of movement. A high shutter speed can help preserve detail if the animal begins walking along a branch or climbing down.
Do not ask the guide to disturb the leopard or force it into a clearer position. Waiting for a natural change in posture is part of wildlife photography.
Cheetahs and open-country photography
Cheetahs are often photographed in open grassland, where their body shape and long legs are clearly visible. A standing cheetah against a distant horizon can produce a clean portrait, while a wider image can show how the animal fits into the surrounding habitat.
If a cheetah starts walking, leave space ahead of it in the frame. This gives the photograph a sense of direction and avoids making the animal appear crowded.
A hunt may occur, but it cannot be planned or guaranteed. If fast movement begins, maintain a safe position and follow the guide’s instructions. A shutter speed of around 1/1600 second or faster may help capture rapid action when the light permits.
Midday rest and afternoon session
After the morning drive, have lunch and rest at the accommodation or a permitted picnic area. Use the break to review selected images, recharge equipment and prepare for the afternoon.
The second game drive can focus on an area where the morning produced promising sightings or explore another suitable habitat. If predators are quiet, spend time photographing giraffes, antelopes, birds or other wildlife.
As the afternoon progresses, look for warm light, long shadows and animals moving through dust. These conditions can add depth to photographs, particularly when the subject is positioned against a darker background.
Return to camp according to park regulations. After dinner, select your strongest photographs and check that your backups are complete.
Day 5: Serengeti National Park – The Great Migration and Large Herds
Overnight: Serengeti National Park
Main activities: Extended wildlife photography drive
Photography focus: Wildebeest, zebras, herd movement, dust and migration landscapes
Today is devoted to large herds and the movement of wildlife across the Serengeti ecosystem. If the Great Migration is passing through the selected area during your visit, your guide will plan the day around recent herd locations.
The migration is a natural movement of wildebeest and other grazing animals in response to seasonal rainfall and grass availability. The animals do not follow a fixed timetable, so the experience can differ considerably between travel months.
Photographing wildebeest herds
Large herds offer a chance to work with patterns, movement and scale. A wide photograph can show hundreds or thousands of animals spread across the plains, while a tighter frame can focus on individuals moving through dust.
Before photographing, observe the direction in which the herd is travelling. If the animals are moving from left to right, leave space ahead of them rather than placing the leading animals directly against the edge of the frame.
A wide-angle lens can be effective when animals are close enough to fill the scene. A telephoto lens is useful for isolating smaller groups or photographing details within a larger herd.
Try to create several different images. One can show the overall landscape, another can concentrate on a group of wildebeest, and a third can focus on the dust and movement created by the herd.
Zebra and other grazing animals
Zebras often move alongside wildebeest and provide a different visual pattern through their black-and-white coats. Photographing several zebras together can create strong shapes, particularly when their bodies overlap in an interesting way.
Look for interactions rather than taking only standing portraits. Animals walking, feeding or turning their heads at the same time can make a more engaging composition.
You may also encounter gazelles, topis and other antelopes. Their behaviour and body shapes provide variety and help show the range of wildlife living in the ecosystem.
River crossings: What to expect
Some periods of the migration are associated with river crossings in parts of the northern Serengeti. These events can be dramatic, but they are unpredictable. Herds may gather near the river, wait for long periods, change direction or cross at a different location.
If river crossings are a major priority, consider arranging accommodation in the northern Serengeti for the appropriate period. This may require changing the route and reducing time in another area.
At a crossing, a fast shutter speed can help capture animals moving through water. A setting around 1/1600 second or faster may be useful, depending on light and the speed of movement. A slower shutter speed can convey motion creatively, but it is sensible to secure some sharp images first.
Do not focus exclusively on crossings. Herds gathering along a riverbank, animals drinking or a line of wildebeest moving across a ridge can produce excellent photographs without the need for a dramatic event.
Afternoon photography
After a packed lunch or a suitable break, continue exploring the selected area. The guide may suggest remaining near a productive location rather than driving a long distance in search of another sighting.
Look for compositions that include both animals and landscape. The Serengeti’s open plains are part of the story, and wide photographs can communicate the scale of the migration better than close portraits alone.
Return to camp in the evening and back up your images. During dinner, discuss the next day’s priorities with your guide. You may decide to concentrate on animal behaviour, birds, smaller mammals or a different area of the park.
Day 6: Serengeti National Park – Animal Behaviour, Birds and Creative Photography
Overnight: Serengeti National Park
Main activities: Morning and afternoon game drives
Photography focus: Animal interactions, family groups, birds, smaller mammals and landscapes
This day provides more time to work on subjects that may have received less attention during the earlier drives. Instead of concentrating only on large mammals, look for behaviour and details that tell a fuller story of the Serengeti.
Wildlife photography often rewards patience. An animal may remain in one place for a long time before doing something interesting. A guide who understands photography can help you decide when to wait and when it is more useful to move on.
Morning: Photographing natural behaviour
Start early and look for animals that are active in the cooler hours. Depending on the area, you may see lions returning from a night of movement, hyenas travelling through the grass, giraffes feeding among trees or antelopes moving across open ground.
Observe a sighting before taking photographs. Notice the animal’s direction, the light and the position of other animals nearby. This can help you anticipate movement and avoid making many frames with poor composition.
If a lioness is resting with cubs, for example, watch for grooming, play or changes in position. When activity begins, use continuous autofocus and a shutter speed suitable for the movement.
Family groups are useful photographic subjects because they show relationships between animals. A mother and calf, a group of elephants walking together or young lions playing can provide images with more meaning than a single portrait.
Photographing smaller mammals
Smaller animals are easy to overlook when the main purpose of the drive is to find predators. However, ground squirrels, mongooses, hares and other small mammals can add variety to your collection.
These subjects often move quickly and may disappear into vegetation. Keep the camera ready when you notice movement beside the track, but do not rush the guide into an unsafe or prohibited position.
A lower shooting angle can make a small mammal appear more naturally placed within its habitat. Where the vehicle allows it, try to photograph the animal against a clean background rather than a tangle of grass and branches.
Bird photography
Birds provide another opportunity to practise focus, exposure and timing. Depending on the season and habitat, the Serengeti may offer sightings of rollers, hornbills, eagles, vultures, secretary birds and many other species.
For birds in flight, a fast shutter speed and continuous autofocus are helpful. Start around 1/2000 second when the light permits, then adjust according to the bird’s speed and direction.
When photographing a perched bird, pay attention to the angle of the head and the light in the eye. A sharp image with a clean background is often more effective than a technically complicated photograph with distracting branches.
Midday: Rest and photograph review
Take a break during the warmer part of the day. Drink water, eat lunch and review a selection of photographs.
Look for areas where you can improve during the afternoon. Perhaps most of your images are close portraits, or perhaps you have photographed many animals but few landscapes. Identifying these gaps helps you use the remaining time more effectively.
Afternoon: Details and environmental portraits
Use the afternoon to make photographs that combine animals and their surroundings. A giraffe beneath an acacia tree, elephants moving through dry grass or zebras crossing an open plain can help communicate the character of the Serengeti.
You may also photograph details such as the pattern of a zebra’s coat, an elephant’s skin, a bird’s feathers or a lion’s mane. These photographs can be useful when arranged alongside wider images in a travel album or photographic story.
Do not crop so tightly that the subject loses its context unless the intention is a deliberate abstract image. A photograph should have a clear purpose, whether it shows the animal’s appearance, behaviour or habitat.
Return to camp in the evening and make a second backup of your images. The following day involves leaving the Serengeti and travelling towards the Ngorongoro highlands.
Day 7: Serengeti to Ngorongoro Conservation Area – Changing Landscapes
Overnight: Ngorongoro highlands or Karatu
Main activities: Morning wildlife viewing, road transfer and arrival at the next accommodation
Photography focus: Final Serengeti images, highland scenery and landscape photography
Enjoy an early breakfast before leaving for the final morning session in the Serengeti. Depending on the location of your camp and the day’s route, there may be time for a short game drive before departure.
Use the morning to photograph a subject that deserves more attention. If you have spent most of your time with predators, you may want to look for birds or grazing animals. If the migration has been the main focus, a wide landscape showing the herds in their surroundings can provide a useful final image.
Your guide will consider the driving distance, park requirements and the location of your next accommodation. It is important not to plan a long photography session that would make the transfer difficult or require rushed driving.
The journey towards Ngorongoro
The route out of the Serengeti can take several hours, depending on the departure point, road conditions and stops. As you travel, the scenery changes from open plains to other habitats and eventually to the elevated landscapes of the Ngorongoro area.
These changes offer useful opportunities to photograph the broader environment. A distant line of hills, trees growing along a road or mist over the highlands can help create a visual record of the journey.
If suitable viewpoints are available, ask your guide whether a stop is possible. Follow all rules about where vehicles may stop and where visitors can walk.
Dust protection remains important during the transfer. Keep your camera bag closed when equipment is not in use and avoid changing lenses in exposed areas.
Understanding the Ngorongoro Conservation Area
The Ngorongoro Conservation Area is a distinctive conservation landscape containing wildlife habitat, highlands and areas where local communities live and carry out their activities.
It differs from a conventional national park in its land-use arrangements and conservation approach. Your guide can explain the local rules and help you understand the landscape as you travel through it.
Depending on your route, you may pass near viewpoints overlooking the crater or through areas of woodland and open highland vegetation. Conditions can change quickly, and cloud or mist may affect visibility.
Arrival and preparation
Arrive at your lodge or camp in the afternoon or early evening, depending on the route and travel conditions. After checking in, organise your equipment for the next day’s crater visit.
The highlands can be cooler than the Serengeti, particularly early in the morning. Pack a warm layer, a rain cover and enough water for the game drive.
Confirm the departure time with your guide. If you are staying in Karatu rather than near the crater rim, the morning transfer will need to account for the additional distance.
Use the evening to review your photographs and confirm that the important files have been backed up. The next day is dedicated to Ngorongoro Crater, where the combination of grassland, wetlands and volcanic slopes provides a different photographic environment.
Day 8: Ngorongoro Crater – Wildlife in a Volcanic Landscape
Overnight: Karatu or Ngorongoro highlands
Main activities: Early crater descent and extended game drive
Photography focus: Lions, buffaloes, zebras, wildebeest, hippos, birds and environmental portraits
After an early breakfast, travel to the authorised crater access point and descend to the crater floor with your guide. The exact departure time and entry arrangements depend on your accommodation and the current park regulations.
Ngorongoro Crater is one of Tanzania’s most distinctive wildlife destinations. Its grasslands, wetlands, woodland and lake habitats support a wide range of animals within a relatively concentrated area.
The crater is not a place where every species will be visible at once. Wildlife movements, vegetation, weather and the location of water influence what you see during the day. However, the varied habitats create several photographic opportunities within a single visit.
Morning: Lions and large mammals
Begin by observing wildlife against the crater landscape. Lions may be seen resting in grassland or moving through areas where the vegetation provides cover. Buffaloes, zebras and wildebeest may be found in open areas, depending on the conditions.
When photographing a lion, look for a clear view of the face and eyes. A tight portrait can work well, but a wider photograph showing the animal against the crater slopes may tell a more complete story.
Zebras and wildebeest are useful subjects for practising composition. Their movement across open ground can create lines and patterns, while a group feeding together may provide opportunities to photograph interactions.
If several animals are visible, avoid including too many subjects without a clear purpose. Decide whether the photograph is about a single animal, a group interaction or the wider landscape.
Black rhinoceros photography
Ngorongoro is one of the places where visitors may have an opportunity to see the endangered black rhinoceros. Sightings are not guaranteed, and the animals may be distant or partly hidden by vegetation.
If a rhinoceros appears, follow your guide’s instructions and use your telephoto lens where appropriate. Do not expect a close portrait. A photograph that clearly records the animal in its natural environment may be a valuable result, even if the subject occupies only a small part of the frame.
Responsible viewing is particularly important for threatened species. Do not pressure the guide to approach too closely or move outside authorised routes to obtain a better angle.
Wetlands, hippos and waterbirds
The crater’s wetland areas can provide opportunities to photograph hippos and waterbirds. Depending on the season, birds may be feeding around shallow water, resting along the shore or moving between wetland areas.
When photographing birds near water, pay attention to reflections and bright highlights. A dark bird against bright water can be difficult to expose correctly, so check the subject rather than relying entirely on automatic exposure.
A calm reflection can create an effective composition, but it is not always necessary. A photograph of a bird feeding or taking off may tell a stronger story than a static reflection.
Midday break
Take lunch at a permitted location arranged by your guide. Follow instructions about where to stop, where food may be eaten and how rubbish should be handled.
The crater can become busy, particularly during popular travel periods. Several vehicles may gather around well-known wildlife sightings, making it difficult to obtain a clear photographic angle.
If a sighting is crowded, remain patient and discuss suitable options with your guide. Do not assume that other vehicles will move immediately, and avoid any action that could disturb the animals.
Use the break to drink water, rest and review a few photographs before the afternoon drive.
Afternoon: Final crater photography
Spend the remaining time looking for subjects that have not yet featured strongly in your collection. Depending on local conditions, these may include elephants, hyenas, jackals, antelopes, birds or additional views of the crater landscape.
The afternoon is also a good opportunity to practise environmental portraits. Rather than filling the entire frame with an animal, include enough of the surrounding habitat to show where it lives.
Your guide will determine the appropriate time to leave the crater floor according to the applicable rules. Return to your accommodation in the afternoon or early evening.
Evening: Organising your photographs
After dinner, review the strongest photographs from Tarangire and the Serengeti alongside the images from Ngorongoro.
Try to identify a balanced set of images. Include wide landscapes, close portraits, animal behaviour and birdlife. A collection with different perspectives will generally tell a more interesting story than one made up entirely of similar portraits.
Make sure your photographs are backed up before preparing for the final day.
Day 9: Return to Arusha or Kilimanjaro International Airport – End of the Safari
Main activities: Breakfast, final checks and transfer
Photography focus: Optional landscapes along the route, subject to time
Safari conclusion: End of the nine-day wildlife photography adventure
Enjoy breakfast before beginning the journey back towards Arusha or Kilimanjaro International Airport. The transfer time depends on where you stayed the previous night, traffic, road conditions and the location of your flight.
If you stayed in Karatu, the drive to Arusha generally takes several hours. Reaching Kilimanjaro International Airport may take longer, so it is important to allow sufficient time for the road journey, check-in and airport procedures.
Your international flight should be scheduled with the transfer in mind. An early departure may require an additional night near the airport or a different accommodation arrangement. Confirm the flight details before finalising the safari schedule.
Final photography opportunities
If your flight is later in the day, there may be time for a few photographs of the highland landscape along the route. Any stops should be agreed with your driver and must fit the available time.
Avoid planning a lengthy photographic excursion on the final morning. The priority is to reach the airport with enough time for check-in and any required formalities.
Equipment and luggage checks
Before leaving the accommodation, check for camera batteries, chargers, memory cards, storage drives and other small accessories. These items are easy to overlook after several days of moving between camps.
Keep valuable camera equipment and memory cards in suitable hand luggage whenever possible. Confirm your airline’s cabin baggage rules and weight limits before travelling.
At the airport, complete check-in and security procedures according to your airline’s instructions. If you are continuing to another destination in Tanzania or connecting to an international flight, allow enough time for the transfer.
Looking back on the experience
Over nine days, this safari provides opportunities to photograph several distinct environments. Tarangire offers elephants, baobabs and birdlife. The Serengeti provides extended time with predators, large herds and open landscapes. Ngorongoro adds a volcanic setting with a wide range of wildlife.
Not every sighting will happen in perfect light, and some animals may remain distant or hidden. These are normal parts of wildlife photography. The most useful approach is to remain patient, work with the guide and make the best of the conditions available.
The safari ends with the return transfer, but the photographic work can continue at home. Sorting, editing and arranging the images will help you build a collection that reflects not only the animals you saw but also their behaviour and the places where they live.
Best Time for An Extraordinary Wildlife 9-Day Photography Safari (2027–2029)
The best travel dates depend on your photographic priorities. Tanzania offers opportunities throughout the year, but rainfall, vegetation, animal movements and light conditions change with the seasons.
January to March: Calving season
This period can be productive for photographing young wildebeest and other grazing animals, particularly in the southern Serengeti and Ndutu area when the herds are present. Predator activity may provide additional opportunities, although sightings and behaviour are never guaranteed.
The grasslands can be greener, providing a different background from the dry-season plains. Seasonal rain may affect roads, and the best location for wildlife photography depends on recent rainfall and herd movements.
June to October: Dry season
The dry season is popular for classic wildlife photography. In many areas, shorter grass can make animals easier to see, and wildlife may concentrate around available water sources.
Parts of the northern Serengeti may offer opportunities to observe migration-related river activity during suitable periods. However, river crossings are unpredictable, and the herds may be elsewhere when you arrive.
July to October can be busy, so it is sensible to book accommodation and a private vehicle well in advance.
November to December: Short rains
The short rains can bring fresh vegetation, changing skies and attractive landscape conditions. Wildlife remains present, but road and weather conditions can change quickly.
Migration movements depend on rainfall and the availability of grass rather than fixed calendar dates. If your main goal is to photograph large herds, ask your operator to recommend the most suitable area for the exact dates you are considering.
Recommended Photography Equipment
You do not need the most expensive camera equipment to enjoy this safari. A reliable camera, suitable lenses and a good system for protecting your photographs are more important than carrying an unnecessarily large kit.
| Equipment | Suggested use |
|---|---|
| Camera body | DSLR or mirrorless camera with reliable autofocus |
| Telephoto lens | Around 100–400 mm or 150–600 mm for wildlife |
| Standard zoom | Around 24–70 mm for general scenes |
| Wide-angle lens | Around 16–35 mm for landscapes |
| Spare batteries | At least two, depending on camera and daily use |
| Memory cards | Several reliable cards with sufficient capacity |
| Storage | Two independent backup options |
| Camera protection | Dust cover, rain cover and cleaning cloth |
| Lens support | Beanbag or other suitable support for vehicle photography |
| Clothing | Neutral layers, a warm jacket, hat and sun protection |
A long telephoto lens is useful when animals remain distant, but it is not the best choice for every situation. A wider lens can be more effective when elephants are close or when you want to include the surrounding landscape.
Carry equipment that you can manage comfortably during a long game drive. If you use several lenses, organise them so you can change them quickly when necessary, while keeping the camera protected from dust.
Accommodation Plan: Eight Nights in Northern Tanzania
The accommodation arrangement should be selected according to the season, budget and location of the wildlife areas you intend to photograph.
| Night | Location | Recommended arrangement |
|---|---|---|
| Night 1 | Arusha | Comfortable hotel or lodge |
| Night 2 | Tarangire area | Lodge or tented camp near the park |
| Nights 3–6 | Serengeti | Camp selected according to seasonal wildlife movements |
| Nights 7–8 | Ngorongoro highlands or Karatu | Lodge with practical access to the crater |
This plan provides four nights in the Serengeti, giving you time for predator photography, large herds and more general wildlife observation. If the Great Migration is your main priority, the location of those four nights should be selected according to the travel month.
Accommodation inside or near the relevant wildlife areas can reduce unnecessary driving and allow more time in the field. However, the best choice is not always the most luxurious property. Location, access, meal arrangements and the ability to leave early can make a considerable difference to the photography experience.
Prices and availability for 2027–2029 will depend on the season, room category and demand. Confirm the final properties, room arrangements and rates before making payment.
What Is Included in An Extraordinary Wildlife 9-Day Photography Safari?
The exact inclusions depend on the operator and the selected accommodation. A private photography safari can generally be arranged with the following services.
Possible inclusions:
- Airport transfers as specified in the booking.
- Private 4×4 safari vehicle with a professional driver-guide.
- Eight nights of accommodation.
- Meals according to the selected accommodation plan.
- Park and conservation fees where explicitly included.
- Game drives according to the agreed itinerary.
- Drinking water in the safari vehicle, subject to the operator’s arrangements.
- Assistance with route planning and wildlife photography logistics.
Expenses to confirm or budget for separately:
- International flights and travel insurance.
- Visa fees and personal expenses.
- Tips for the guide and accommodation staff.
- Alcoholic beverages, laundry and personal purchases.
- Optional activities not listed in the quotation.
- Additional hotel nights required by flight schedules.
- Photography equipment hire, if needed.
- Any park fees, transfers or services excluded from the agreed price.
Ask for an itemised quotation that explains exactly what is included. A safari advertised for photographers does not automatically include specialist equipment, a dedicated photography guide or extra vehicle space.
Important Planning Notes for 2027–2029
Book the right accommodation early
Popular camps can fill up well in advance during the main dry season. Early booking is particularly important if you want a private vehicle, a specific camp location or a room arrangement suited to your group.
Choose a suitable safari vehicle
Photographers often need more space than ordinary sightseeing passengers. Ask about seat arrangements, window access, charging facilities and the number of photographers per vehicle.
If you use long telephoto lenses, discuss the available support and whether you can comfortably photograph from your seat. Confirm these details before paying a deposit.
Keep the daily schedule realistic
Early starts can be worthwhile, but the schedule must respect park regulations, driving times and accommodation arrangements. A good guide will balance time at sightings with the need to reach the next destination safely.
Protect your equipment
Dust is common on some safari roads, while rain can affect travel in other periods. Keep camera bags closed when equipment is not being used and carry suitable protection for your lenses and camera body.
Temperatures may also vary between the warmer lowlands and the cooler Ngorongoro highlands. Bring clothing that works for both early mornings and warmer afternoons.
Confirm fees and permits
Park fees, conservation charges and other applicable costs can change before your travel dates. Ask your operator to confirm the current fees and identify which charges are included in the price.
The final itinerary should also specify the planned accommodation, route, vehicle arrangements and any optional activities.
Frequently Asked Questions
Is nine days enough for a wildlife photography safari in Tanzania?
Yes. Nine days provides time to visit Tarangire, spend several days in the Serengeti and finish with a crater game drive at Ngorongoro. It is a useful duration for photographers who want a varied experience without travelling between destinations every day.
Can I see the Great Migration?
It is possible, depending on the month and location of the herds. The migration follows seasonal conditions, so the itinerary should be tailored to the expected wildlife distribution. River crossings cannot be guaranteed.
Is this safari suitable for beginner photographers?
Yes. Beginners can use the trip to learn camera settings, composition and focusing techniques. Experienced photographers can concentrate on animal behaviour, action photography, birds and more specialised subjects.
Will the safari be private?
The itinerary is designed as a private safari. Confirm that the quotation includes exclusive use of the vehicle and clarify the maximum number of passengers.
Can the itinerary be customised?
Yes. The number of nights in each park, accommodation category and daily schedule can be adjusted. If you have a particular photographic goal, such as the calving season, river crossings or bird photography, the route should be planned around that priority.
What is the best accommodation for wildlife photography?
Accommodation near the relevant wildlife areas can reduce driving time and allow earlier departures. The most suitable property depends on the travel month, your target subjects and your budget.
How much does a nine-day photography safari cost?
The price depends on the season, accommodation category, number of travellers, vehicle arrangements and applicable park fees. A private safari usually costs more per person than a shared trip but provides greater flexibility. Request a quotation based on confirmed properties and travel dates.
Final Overview for An Extraordinary Wildlife 9-Day Photography
This nine-day Tanzania wildlife photography adventure combines Tarangire’s elephants and baobabs, the Serengeti’s predators and open plains, and the distinctive volcanic landscape of Ngorongoro Crater.
The itinerary allows several days for photography in the Serengeti, where patience and flexibility can make a real difference. It also includes time to observe birds, smaller mammals and animal behaviour rather than concentrating entirely on the most famous wildlife sightings.
For travel during 2027–2029, the most important planning decisions are choosing the right season, selecting accommodation in useful locations, confirming the photographic vehicle arrangements and allowing realistic time for road transfers.
The aim is to return with a balanced collection of images that reflects the wildlife, landscapes and natural behaviour encountered during the journey. With a knowledgeable guide, suitable equipment and enough time in the field, nine days can provide a rewarding introduction to wildlife photography in northern Tanzania.
For more information contact https://summerwinteradventures.com/
